
This is a build guide for a robotic car that can be driven by a cell phone.
1) Parts and Equipment
| Part | Number | Total Cost ($) |
|---|---|---|
| Actobotics Warden Chassis | 1 | 200 |
| Raspberry Pi | 1 | 35 |
| Motor Hat: Pololu G2 18v22 | 1 | 70 |
| Pi Channel Snap Mounts | 1 | 2 |
| Male JST Leads | 4 | 10 |
| Female JST Leads | 4 | 10 |
| Battery strap mount | 1 | 10 |
| Matrix NiMh Battery | 1 | 50 |
| Male Tamiya Connector | 1 | 2 |
| Total: | 389 |
| Equipment list |
|---|
| Soldering iron and basic competency |
| Digital multimeter |
| Computer to program raspberryPi |
| Battery charger |
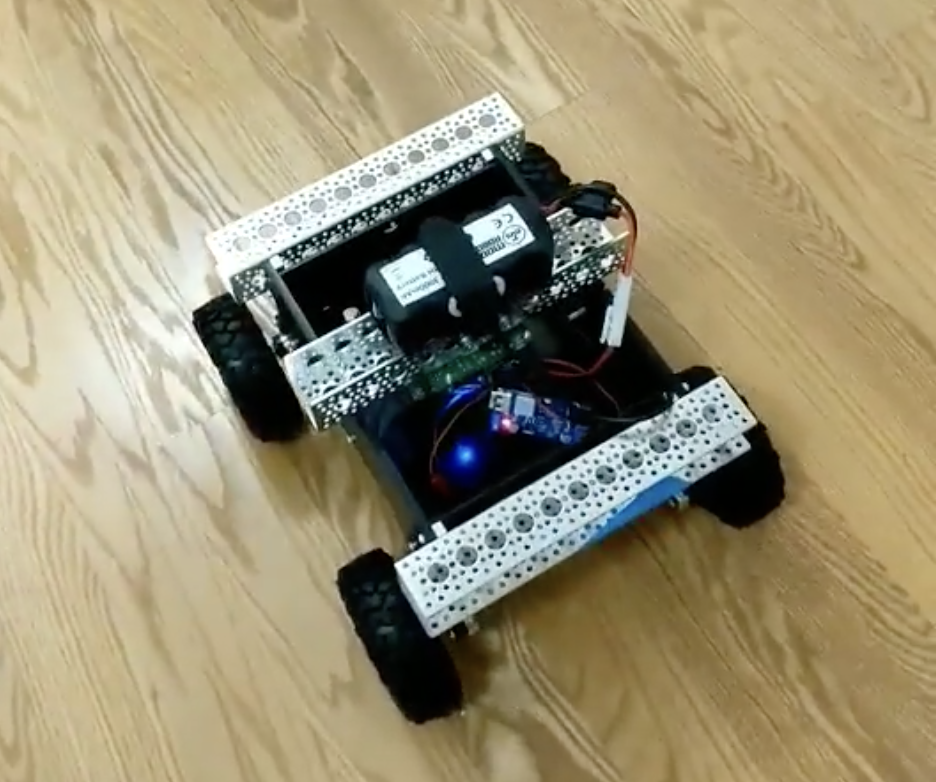
2) Assemble the chassis
ServoCity Actobotics has provided an excellent video of how to perform the mechanical assembly of the chassis. Pull our your hex wrench and plug it together as shown below:
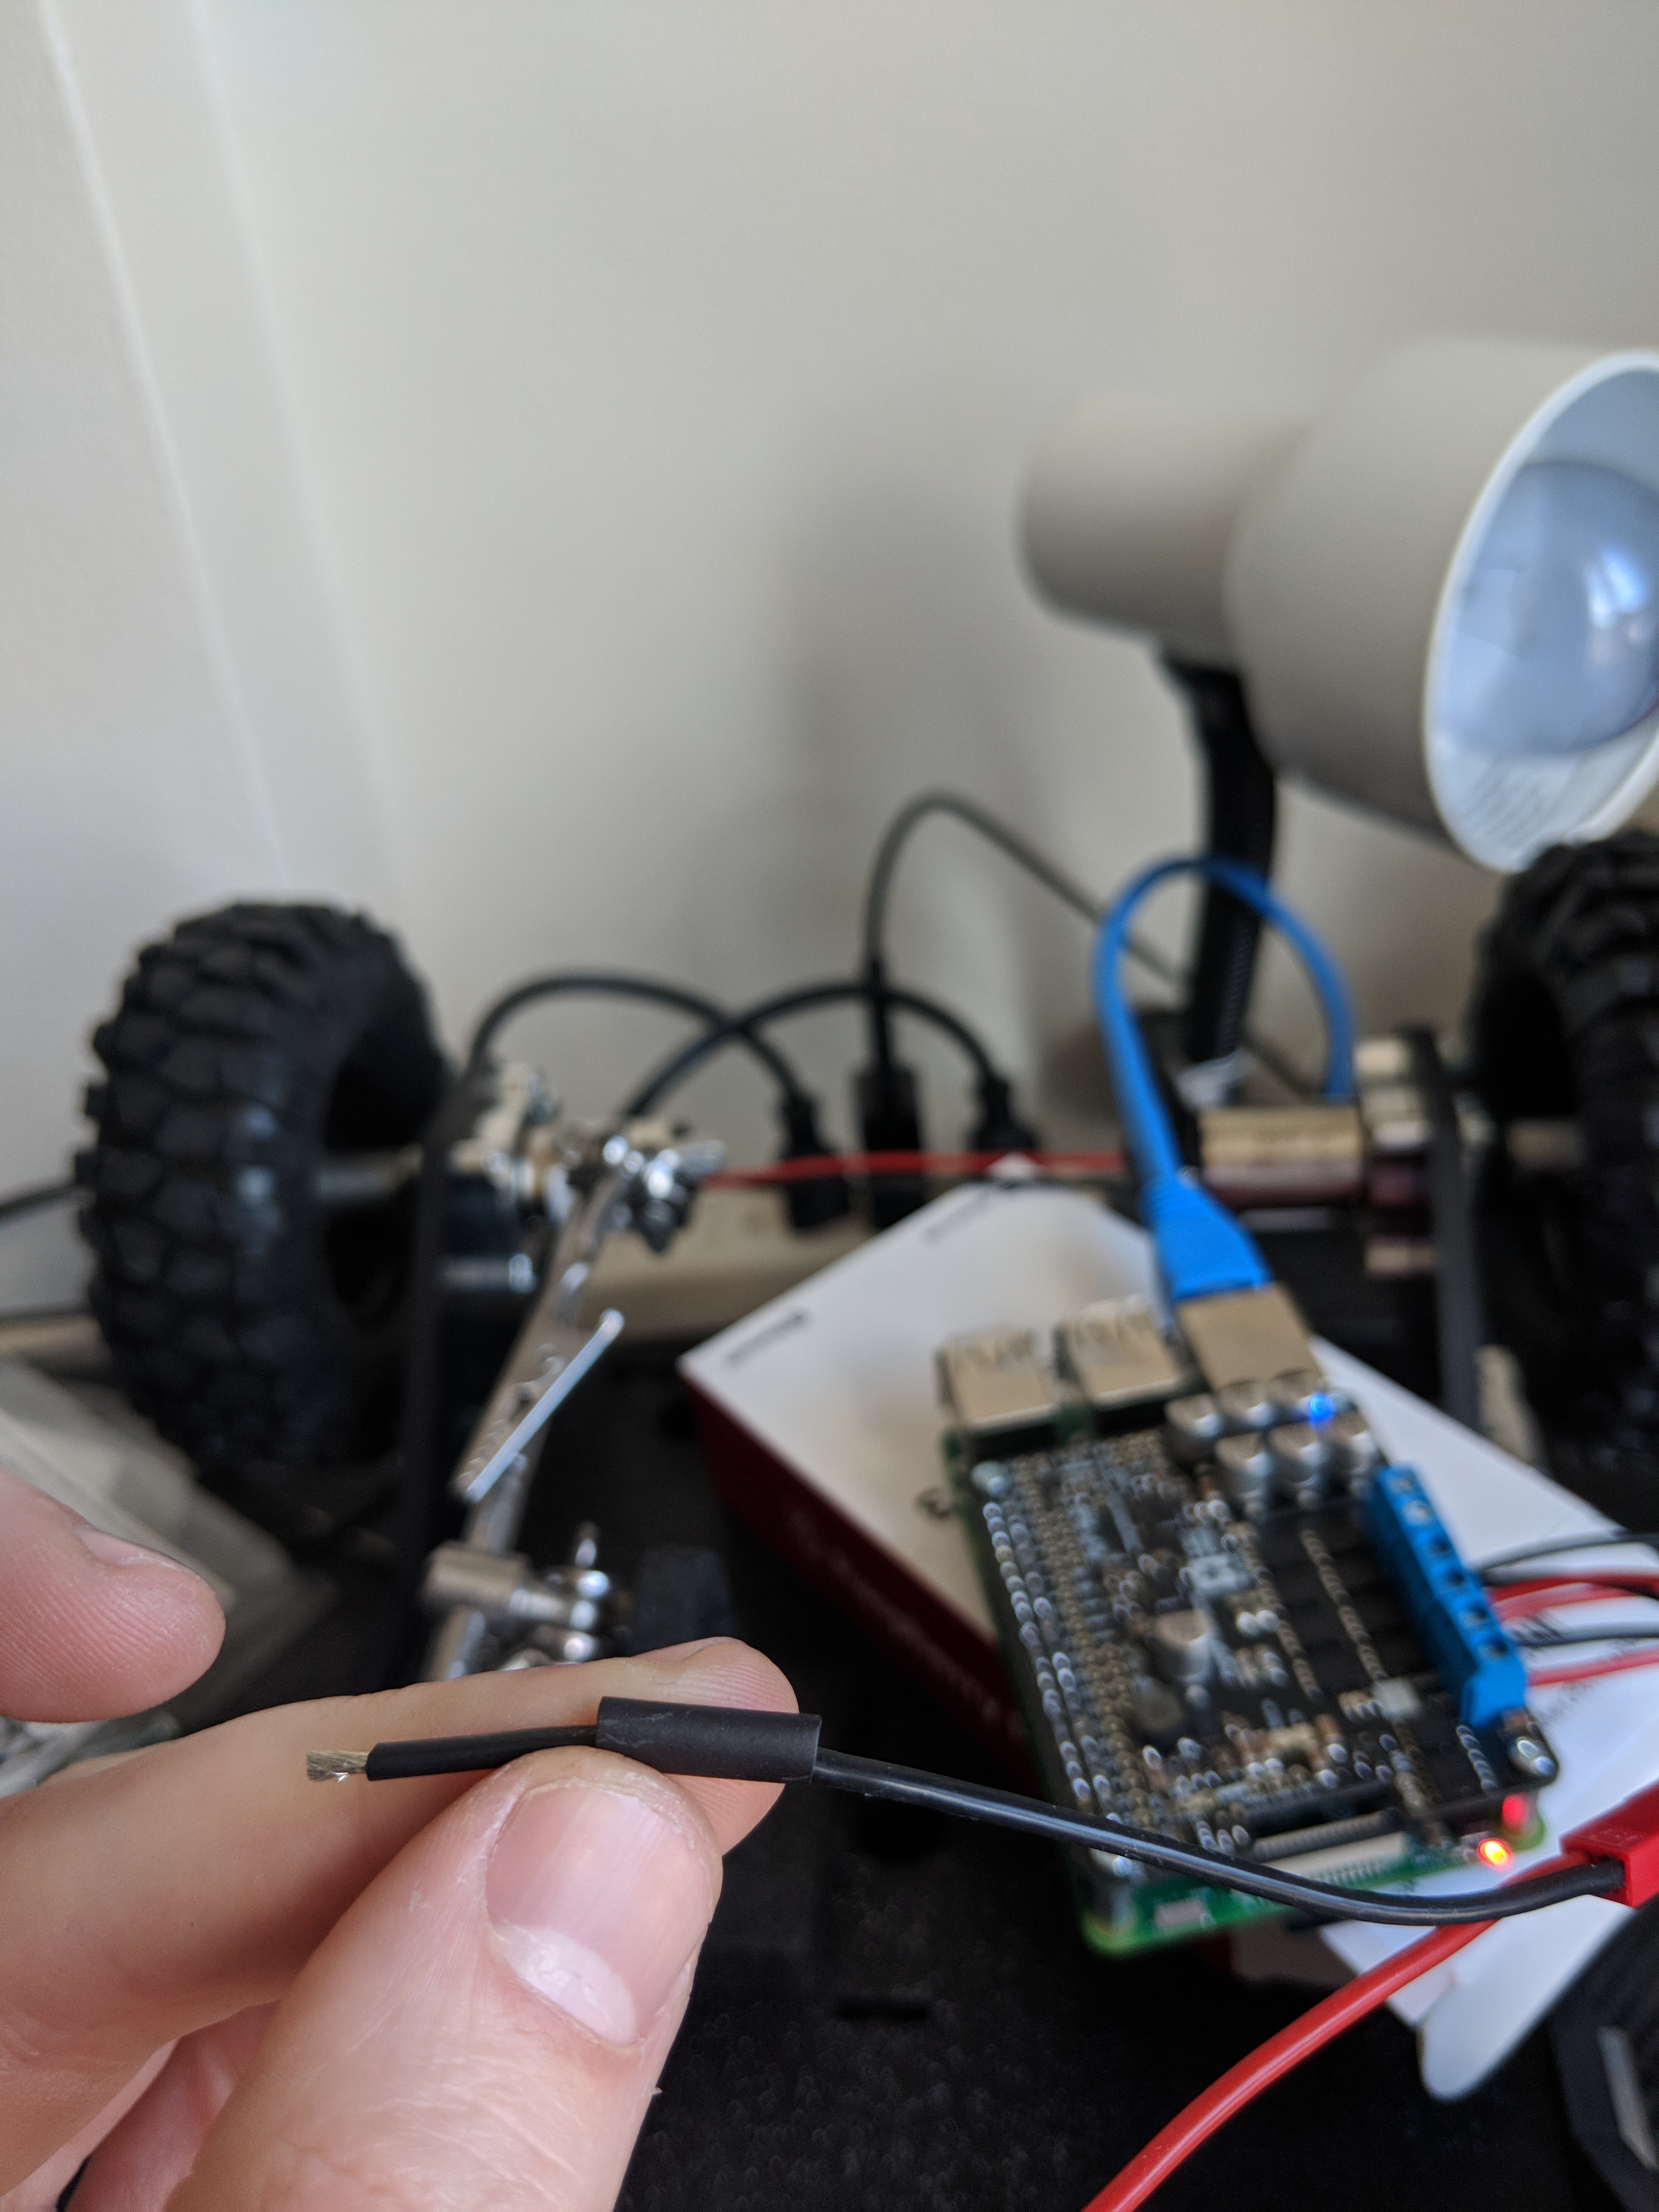
3) Electrical
Once the chassis is assembled, it is time to wire up the motor controller and brain. I have chosen to use as raspberry Pi with the following Motor Hat: Pololu G2 18v22. Each side (left/right) will be slaved to a given H bridge (the blue ports on the side).
I recommend using heat shrink tubing. For this, cut your wire to length (or if you are using the aforementioned JST connectors, just fire in) such that it reaches between the place at which you mount your motor hat and the solder point on a given servo, and ensure you put the shrink wrap on the wire before you solder it, or you will embark on useful training on how to de-solder and re-solder your wire.
Once the tubing is on, solder each wire to a given terminal. The H-Bride will allow you to reverse the polarity of each motor, but if you are color coding your wiring, it is good to ensure that a given color hits the same terminal on each motor.

Once the wires are soldered onto the terminal, it is time to add some heat to the shrink wrap tubing. You can use a hair dryer or a lighter to get it to shrink up, forming a nice seal around your soldering job.
4) Software
Once you have your motors connected to your hat, it is time to fire up some software. I have published the code at the following github repository:
https://github.com/mechiris/RobotCar/tree/master/robotcar
For an initial test, you can use the following example.py from the Pololu motor control repo. It will simple run the motors forwards and backwards to ensure that you have things wired up correctly.
If that works according to plan, it is time to connect things up to drive with your phone. I am using a fantastic mobile IoT application builder called Blynk: https://www.blynk.cc/
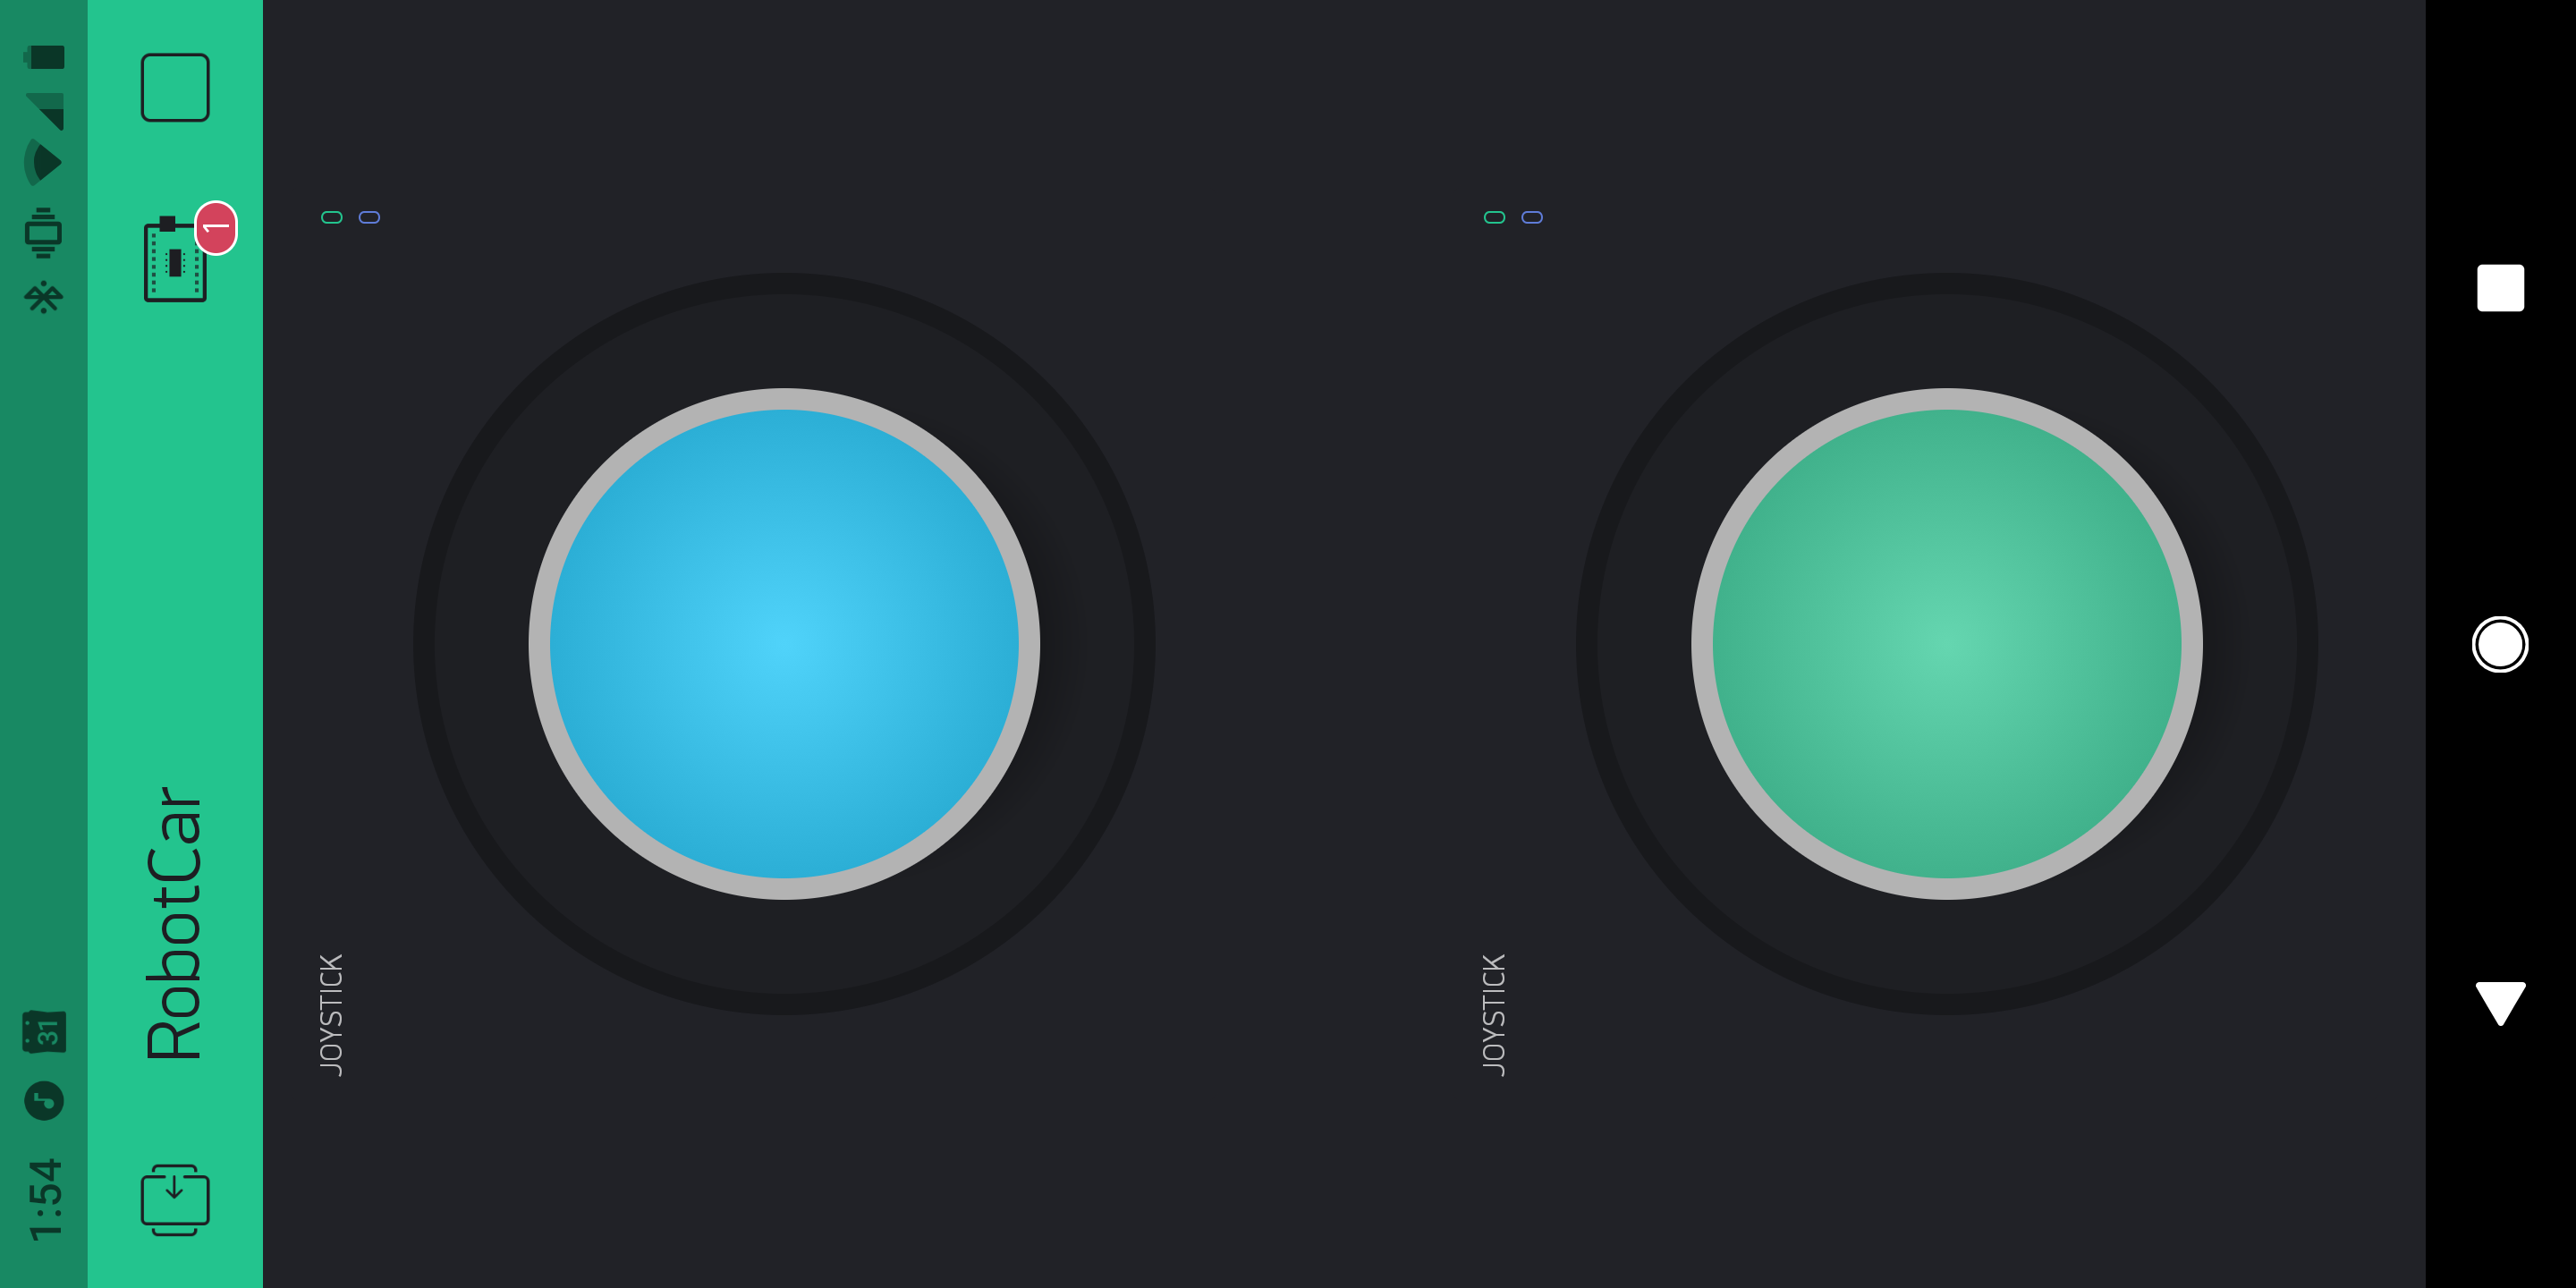
This allows you to connect any IoT device for control/interface with your phone, using drag and drop widgets. For this application, I tried a few different ways of driving the car with my thumbs, and found that providing two separate widgets (one for each thumb) provided the most intuitive driving experience. This is similar to how a tank works, with one widget controlling both the left wheels, and the other controlling both the right wheels. Whenever I mapped the velocity of both wheels back to a single widget, it felt a little clunky and I preferred the transparency of driving each set independently. Your miles may vary.
To do this, drag two joystick widgets out.
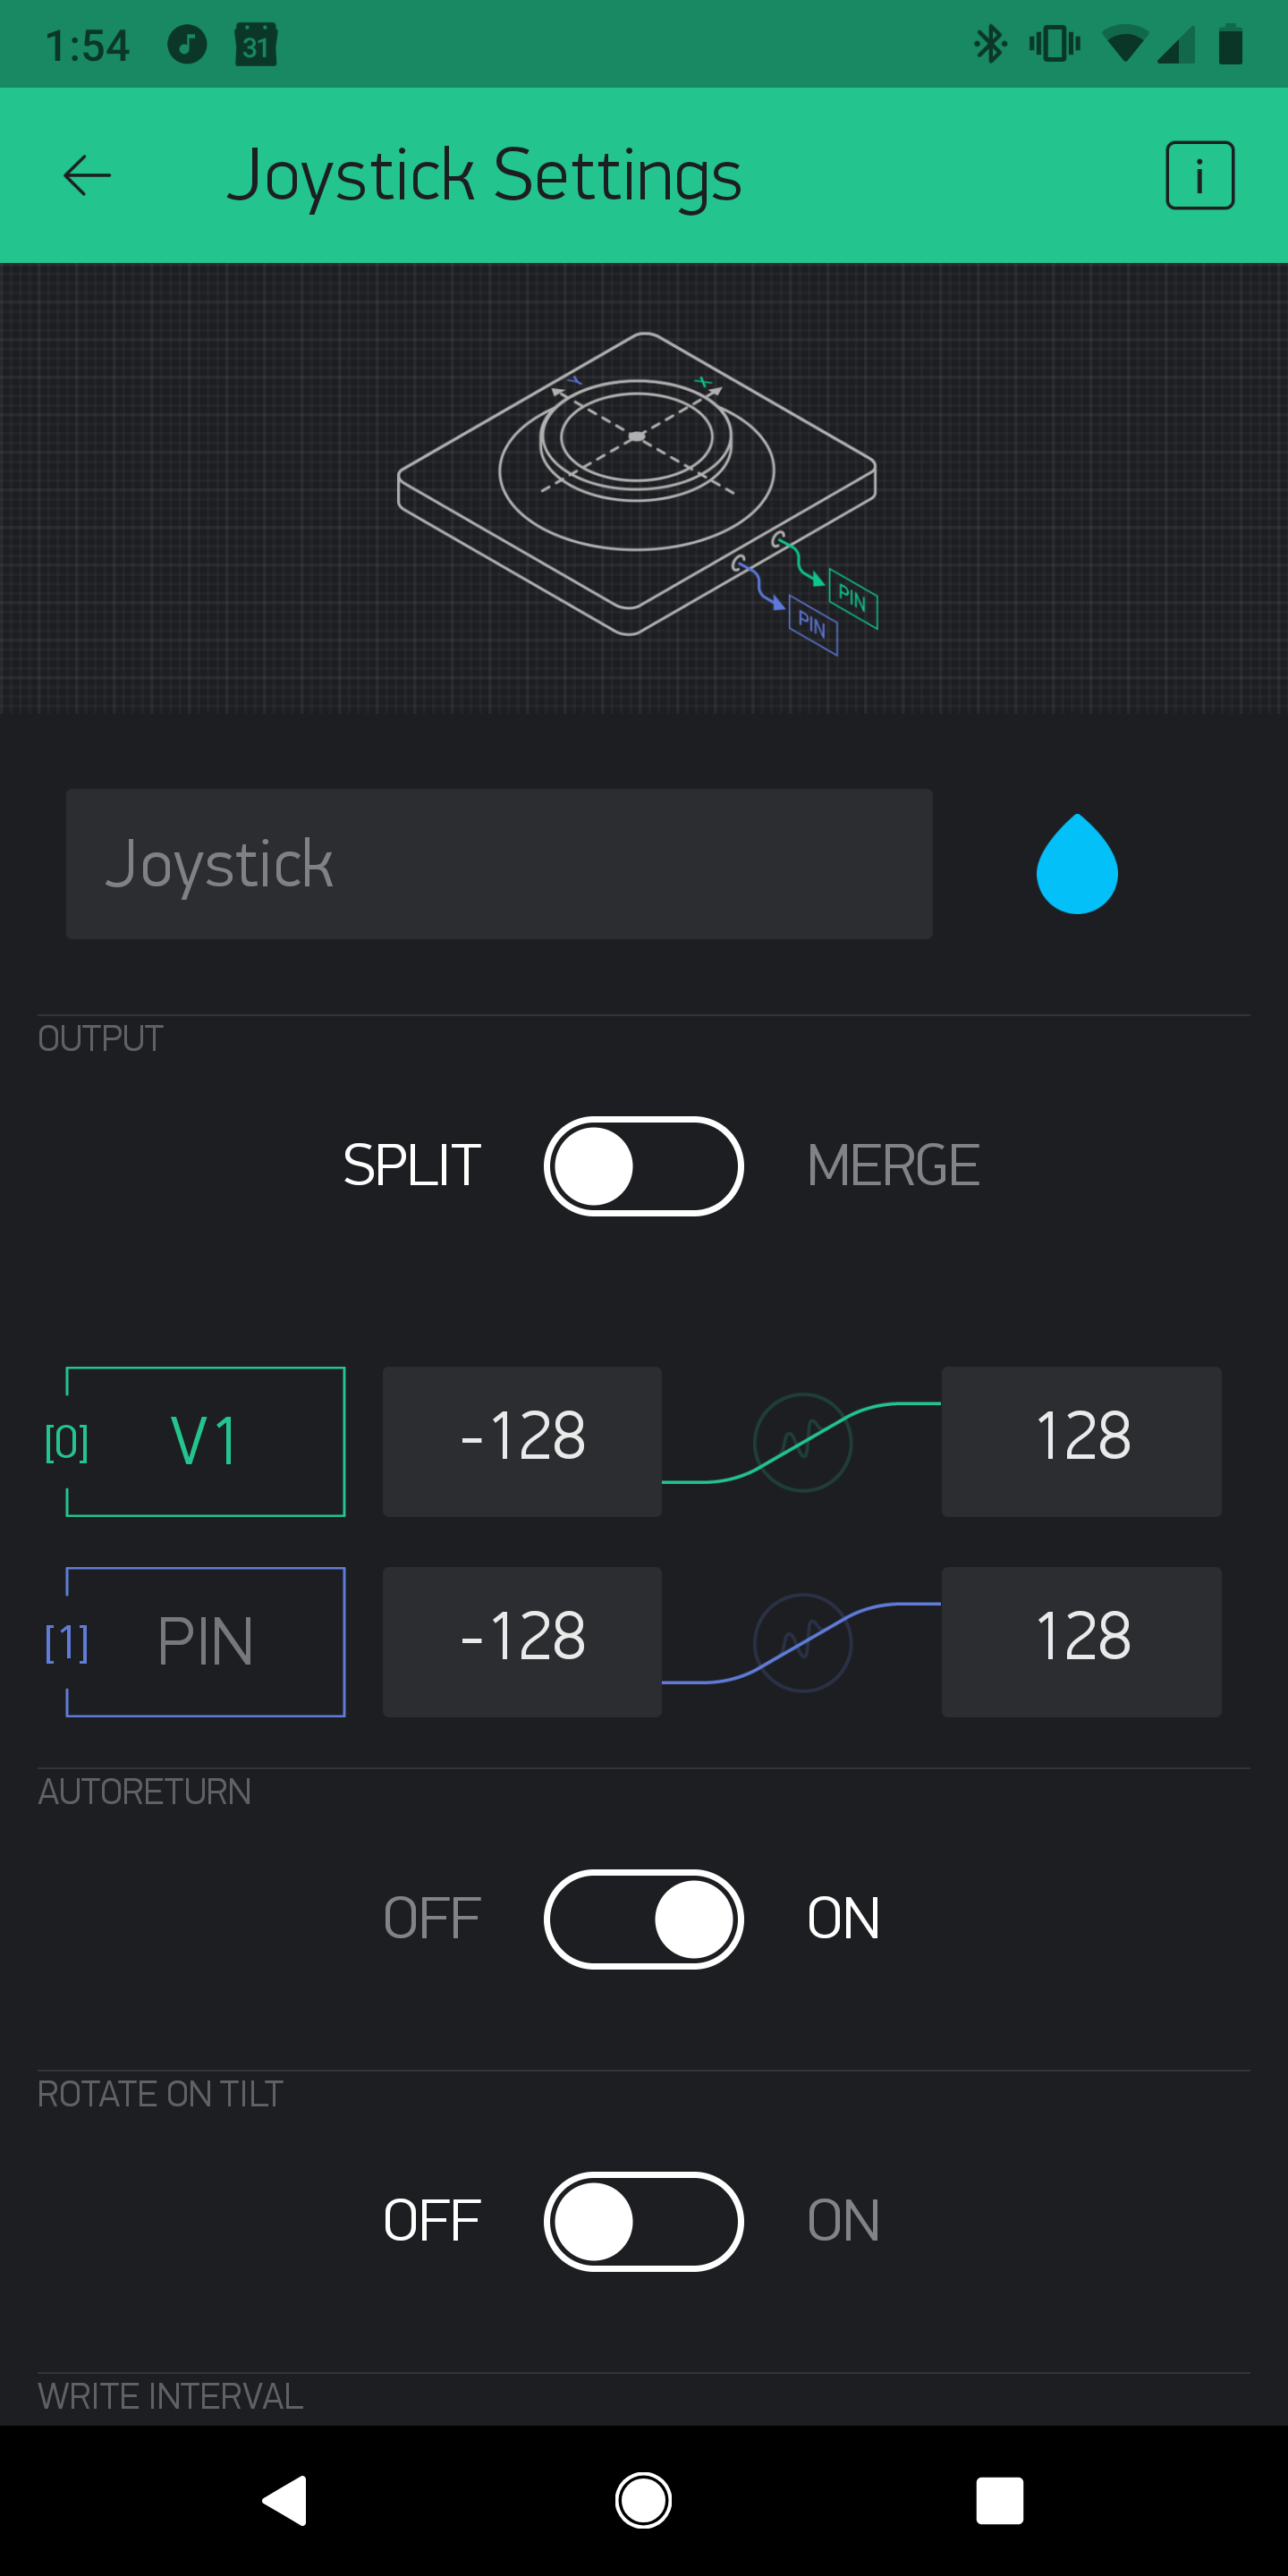
I set them using the following parameters. Note that the Vertical position is the only value of interested with the two thumb setup, and I mapped it from -128->128. Additionally, ensure that your [0] pin matches whatever you have configured to listen on the other end in your python library (I believe I set v1 and v3 as defatul). You can do whatever range & virtual pins you like, but you will need to update the python code receiving the signal should you choose to do something different:
At this point, you can copy your secret key from your blynk application into the creds.txt file in your robotcar repository on your raspberry pi, and you are off to the races!
5) Feedback
If you have additional tips, or areas that were not clear while reading this build guide, I would love to hear about them. Alternatively, if you built something cool similar to this, it would be great to see your creativity! Please reach out.